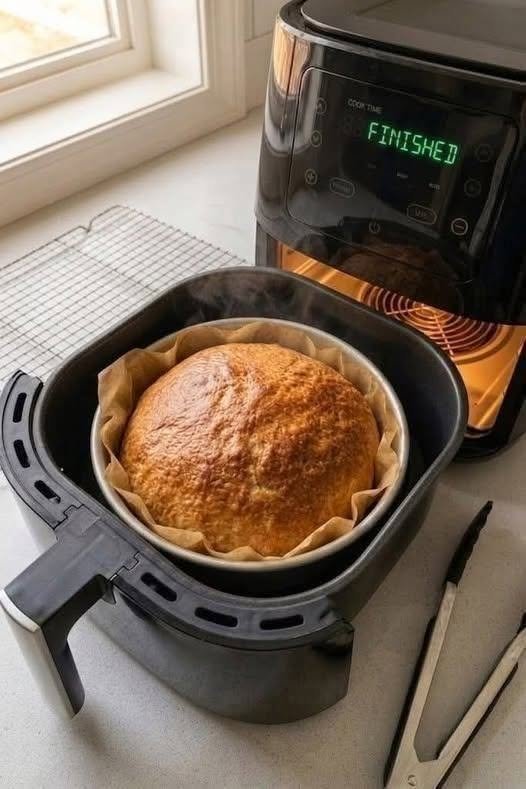
| Metric | Details |
| Active Prep Time | 10 minutes (mixing and shaping) |
| Rising Time | 30 minutes (quick warm rest) |
| Baking Time | 20–25 minutes |
| Total Time | ~1 hour |
| Effort / Intensity Level | Low (Beginner-Friendly) — No stand mixer, kneading drills, or complex shaping techniques |
| Thermal Intensity | Moderate Air Fryer Heat — Baked at 320°F (160°C) initially to cook the interior, then 350°F (175°C) to crisp the crust |
| Yields | 1 small round loaf (fits standard 6-quart air fryer baskets, approx. 6–8 slices) |
The Science of Air Fryer Bread Baking
Understanding how an air fryer transforms simple dough will help you achieve the best possible texture. Traditional ovens rely on radiant heat from stationary elements, which can sometimes dry out smaller baked goods. An air fryer, by contrast, is essentially a miniature convection oven equipped with a powerful fan that forces super-heated air to circulate rapidly in a confined space.
This rapid air movement creates an intense initial heat transfer, causing the moisture inside the dough to turn to steam instantly. This process—known as oven spring—forces the loaf to expand rapidly and puff up while simultaneously caramelizing the outer starches to create a delightful crust without needing a heavy cast-iron Dutch oven.
Essential Equipment
You don’t need professional bakery tools, but having the right heat-safe bakeware ensures your loaf cooks evenly:
-
Air Fryer: Standard 5-quart or 6-quart basket-style air fryer (or toaster-oven style).
-
Small Oven-Safe Baking Dish / Cake Pan: A 6-inch metal cake pan, mini loaf pan, or oven-safe glass ramekin that fits comfortably inside your air fryer basket with at least an inch of space around the sides.
-
Mixing Bowl & Wooden Spoon: For combining the dry ingredients and warm water without overworking the gluten.
-
Parchment Paper: Cut to size to line your baking pan for effortless removal.
-
Instant-Read Digital Thermometer: The gold standard for testing doneness without guessing.
Ingredients
This ingredient list relies entirely on pantry staples that you likely already have in your kitchen:
-
2 cups (240 grams) All-Purpose Flour: Provides the structural foundation. (You can substitute up to half with bread flour for a chewier crumb).
-
1 teaspoon (3 grams) Instant Yeast: Allows for a fast rise without needing a long bulk fermentation.
-
¾ teaspoon Kosher Salt: Enhances flavor and regulates yeast activity.
-
1 tablespoon Sugar or Honey: Feeds the yeast to accelerate the quick rise and aids in crust browning.
-
¾ cup + 1 tablespoon (190 milliliters) Warm Water: Aim for 105°F–110°F (40°C–43°C)—warm to the touch like bathwater.
-
1 tablespoon Olive Oil or Melted Butter: Added to the dough for tenderness and used to grease your baking pan.
-
Optional Toppings: A pinch of flaky sea salt, sesame seeds, or everything bagel seasoning sprinkled on top right before baking.
Step-by-Step Instructions
1. Mix the Dry Ingredients (Intensity: Gentle Stir, 2 Minutes)
In a medium mixing bowl, whisk together the all-purpose flour, instant yeast, and kosher salt until thoroughly combined. Making sure the salt is evenly distributed prevents it from coming into direct contact with concentrated yeast pockets, which can inhibit rising.
2. Combine Wet and Dry (Intensity: Shaggy Dough Formation, 3 Minutes)
In a separate small cup, mix the warm water, sugar (or honey), and olive oil. Pour the liquid mixture into the dry flour blend. Using a wooden spoon or silicone spatula, stir vigorously until a sticky, shaggy dough forms and no dry patches of flour remain. Do not worry about kneading; this is a high-hydration, rustic dough that thrives on simplicity.
3. Quick Proof and Rise (Intensity: Passive Warm Rest, 30 Minutes)
Scrape the dough into a ball inside the bowl, cover with a damp kitchen towel or plastic wrap, and place it in a warm, draft-free spot (such as inside your cold microwave with the door closed) for 30 minutes. Because instant yeast reacts quickly with warm water and sugar, the dough will puff up and develop visible air bubbles.
4. Shape and Prep the Pan (Intensity: Light Shaping, 3 Minutes)
While the dough rises, line your 6-inch cake pan or mini loaf pan with a strip of parchment paper and lightly grease it with oil or butter. Gently punch down the risen dough with your spatula, fold the edges toward the center to form a smooth round boule, and transfer it directly into your prepared baking pan. Let it rest uncovered in the pan for 10 minutes while you preheat.
5. Preheat and Bake (Intensity: Controlled Thermal Cooking, 25 Minutes)
Preheat your air fryer to 320°F (160°C) for 3 minutes. Carefully place your baking pan containing the dough inside the air fryer basket.
-
Phase 1 (Cooking the Interior): Bake at 320°F for 15 minutes to ensure the center cooks thoroughly without burning the exterior.
-
Phase 2 (Crisping the Crust): Increase the temperature to 350°F (175°C) and bake for an additional 8 to 10 minutes. The loaf is finished when the top is a rich, golden-brown color and an instant-read thermometer inserted into the center registers 200°F–210°F (93°C–99°C).
6. Cooling Before Slicing (Intensity: Patience Required, 30 Minutes)
Remove the pan from the air fryer, carefully lift the loaf out using the parchment paper edges, and transfer it immediately to a wire cooling rack. Do not slice immediately. Allowing the bread to cool for at least 30 minutes lets the internal starches set; slicing too early makes the crumb gummy and traps steam.
Serving Suggestions & Storage
Air fryer bread is at its absolute best when sliced warm and enjoyed with simple, high-quality accompaniments:
-
Classic Spread: Slather thick slices with salted European butter, clover honey, or artisanal fruit preserves.
-
Savory Pairing: Dip chunks into extra-virgin olive oil mixed with balsamic vinegar and cracked black pepper.
-
Storage: Store leftover bread wrapped tightly in foil or stored in a paper bag on the counter for up to 2 days. For longer storage, slice the cooled loaf, freeze individual slices in a zip-top bag, and toast them directly from the freezer.
Nutritional Information
The nutritional values below are estimated per serving, assuming the small loaf is divided into 6 equal slices using standard all-purpose flour and olive oil.
| Nutrient | Amount per Slice | % Daily Value* |
| Calories | 135 kcal | 7% |
| Total Fat | 2.5 g | 3% |
| Saturated Fat | 0.3 g | 2% |
| Trans Fat | 0 g | — |
| Cholesterol | 0 mg | 0% |
| Sodium | 240 mg | 10% |
| Total Carbohydrates | 24.5 g | 9% |
| Dietary Fiber | 0.8 g | 3% |
| Total Sugars | 1.2 g | — |
| Protein | 3.5 g | 7% |
